Lakmir's Tower
Cemetery
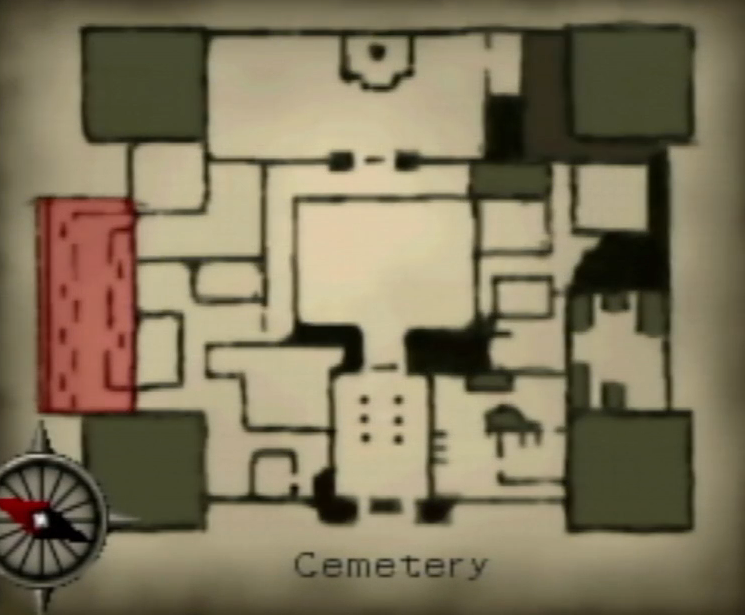
You find yourself in a shallow ditch at the bottom of the rope. Well...shallow for people who aren't pixie-sized. Use the Pixie Flute again to return to your normal size. There's nothing we can do with the tombstones right now, so just follow the path all the way to the door. Head through into the churchyard.
Cathedral Yard
The door on the right is locked, so enter the door of the cathedral on your left.
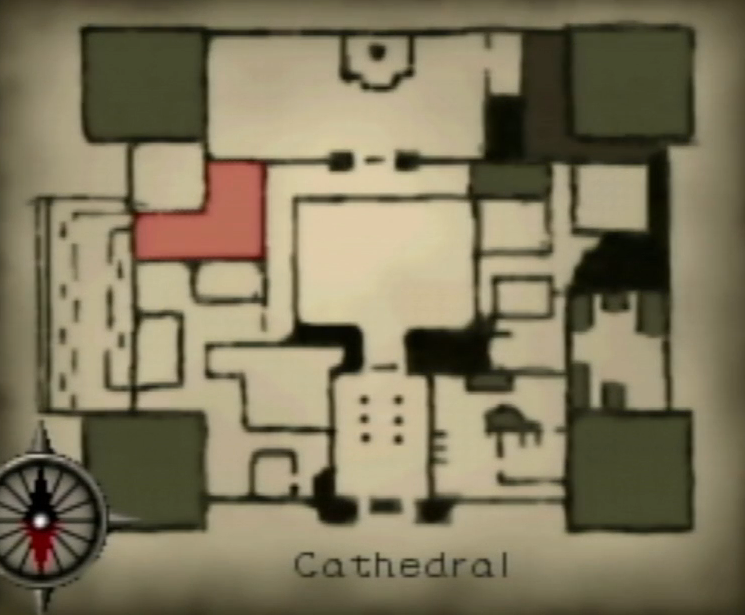
Cathedral
Move forward past the pews and approach the altar to the One. Kind of a plain looking creator deity. But we're not here to judge another culture's gods, we're here to steal stuff from a church. At the foot of the statue is a vial of Dragon Tears which we'll need in a bit, so go ahead and pick that up. Turn around and walk past the first pair of pews and then turn left. Move between the pews and then turn left when you hit the wall. Head down the stairs.
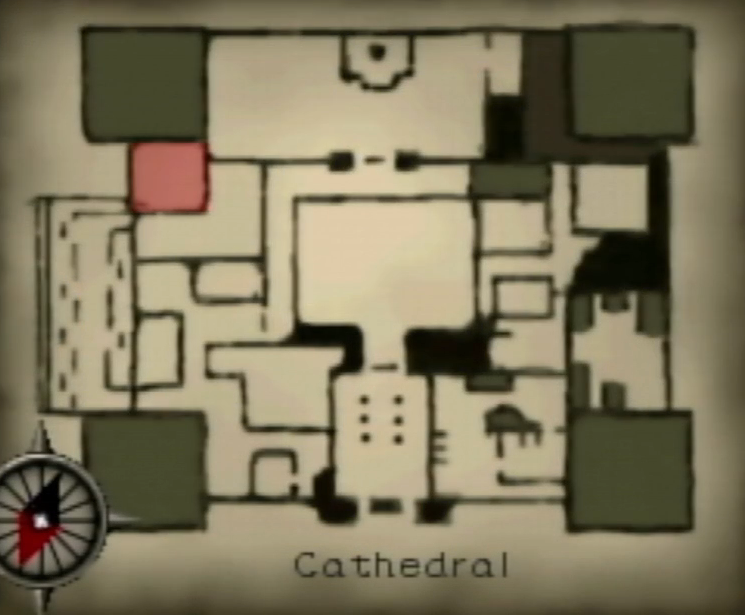
To the right is a bookcase with a key holder board to the left of it. Take the Golden Key hanging on the board. The bookcase has a couple useful items on the floor on either side. Facing the bookcase, there's an Ornate Key on the floor by the back corner. On the opposite side of the shelves, leaning against the wall is a Crowbar. The key is one of five possible solutions to a later puzzle, so you can skip it if you want, but you definitely need the Crowbar. There are two doors in here, one of which is at the bottom of a staircase. But one of them is locked, and the other one leads to a room we can't but much with yet, so we're just going to move on. Head back up the stairs to the worship area.
In front of the second set of pews is a ladder. Climb the ladder to reach a little catwalk area. At the top, there's a chain along the right-hand wall being held in place by the world's largest nail. Use the Crowbar to pry it out, and this will cause a ladder to lower from the ceiling. You may have noticed that the nail flew off to your left. If your hoarder instincts have kicked in, you may want to go retrieve it. You can head back down the ladder and find the Nail in front of the far pew. This is one of five possible solutions for an upcoming puzzle, so it's handy to have but not completely necessary. Once you're ready, ascend the ladder you just lowered to reach the roof.
It is recommended that you save here. Straight ahead is a shuttered window, which is our ultimate destination up here. However, this roof has seen better days. Look down and you'll see some holes. If you step on any of them, you'll fall to your death. So carefully thread your way through them to reach the window. There's a longer route you can take around the other side of the skylight which is a bit less precarious if you're having trouble. Whichever way you take, examine the window once you get to it and Del will climb through.
Lakmir's Tower 2F
There's nothing in this room, so exit through the door and into the hallway. Turn to the right and proceed down the hall until you see a door on either side. The one on the right leads to the kitchen. Approach the counter to the right of the stove and pick up the Bottle of Oil. There's nothing else to do in here for now, so we can pass by the giant conspicuous barrel. Outside of the kitchen, you will no doubt be tempted to enter the room across the hall. While there's nothing stopping you from doing so, there's nothing that can be accomplished in there yet. For now, turn left and head down the stairs at the hallway.
Lakmir's Tower 1F

After descending the stairs, Lakmir appears again. He seems pleased that Del has chosen a good path, and disappears again. Move forward and head through to door to find ourselves in the upper level of a grand foyer. Heading down the staircase in here (either side) will bring us down near the front door of the tower. The door won't open, but if we put our back to it we can spot another door straight ahead. Head through that, and there will be a stairway ahead of us, and a door on either side of the room just before it. You can enter the doors in any order, but we're going to start off with the one on the left.
Inside is a little office area. There are some shelves to the right which hold an Acolyte's Diary if you've got a hankering for more lore. On the desk in this room is a Receipt. This is a shopping list, which at first glance would seem to be not super useful. However, one of the ingredients, a strand of Giant's Hair can also be found on the desk. This might not seem useful, but is actually one of the most important items in the game. That we'll not use for quite awhile yet, so best to pick up the Hair of Giant now so we don't forget to come back and get it. That's all for this room, so go ahead and exit.
Enter the door ahead of you to find another office. Aim yourself to the right of the desk and move forward. Near the far wall on the ground is the Official's Article. This mentions that there's a key that is to be kept in this room at all times when not in use. Sounds handy, but first let's check out the desk. Take the ornate Mug and Magical Elixirs book. The book will tell us a bit about the Dragon Tears we picked up in the Cathedral. Now to find that pesky key mentioned in the Official's Article. If you face the front of the desk, so that your back is to the door, there will be a pillar to the left butting up against the desk's side. On the floor between that pillar and the wall is a Rusty Key. Once you grab that, leave the room.
Turn to the right and head down the stairs.
Lakmir's Tower B1
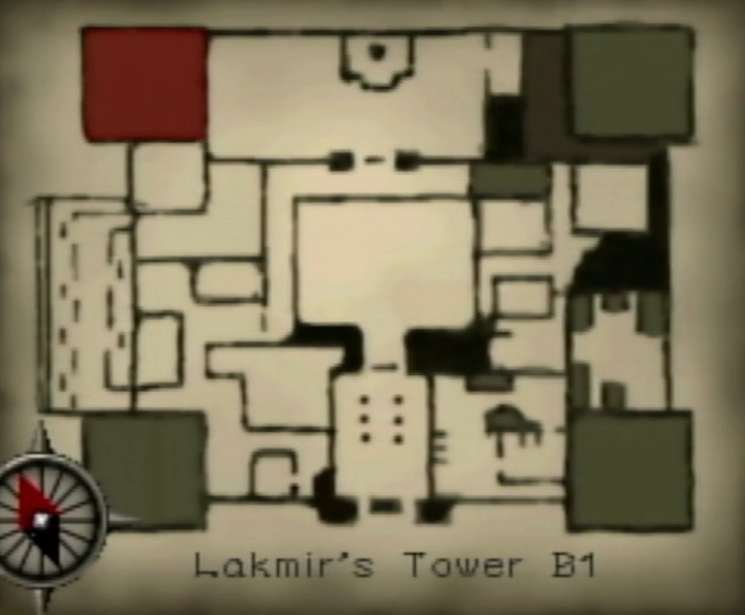
You're greeted by a door that has rusted shut. Use the Bottle of Oil on it to loosen that up, and then open the door. Follow this hall and turn left around the corner, and open up the one door that's in this room. Several large pipes are jutting out from the walls in this room, and there's some fancy machinery on the left. Never pegged Lakmir as being steampunk, but here we are. Move forward and turn right once you hit the wall. There is a slim set of metal doors here with an odd triangular crest on the front of it. Examine the crest to pick up the Star Crest. The doors are locked, so there's nothing else we can do down here. Make your way back up to the second floor.
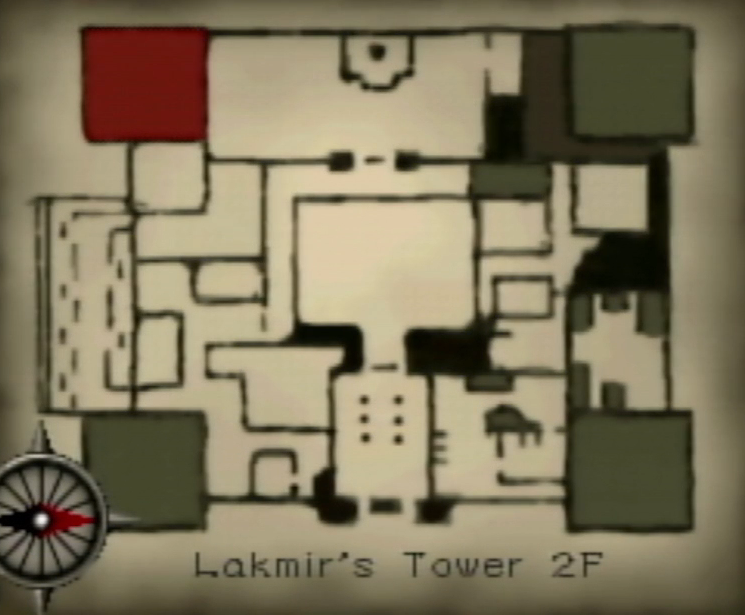
Lakmir's Tower 2F
Once back on this floor, head back into the kitchen (last door on the right). This time, examine the large barrel to remove the lid. Use the Dragon Tears on it to add some magical properties to the water (thank you, Magical Elixers book). Use the Mug with the magic-imbued water to fill it up. Leave this room, and enter the door across the hall. If you read the Student's Diary from the Disciples tower, you'll know that Lakmir was oddly protective of the fireplace in here. Inspecting it reveals that the oddly-colored flame gives off no heat. Use the Mug on it to have Del toss the magic water onto the flames. Now that the fire has been doused, we can see a curious indentation in the back wall. Use the Star Crest on this indentation to find that it fits perfectly. The rumbling of the tower means that something has been activated! Make your way back down to the room you picked up the Star Crest from.
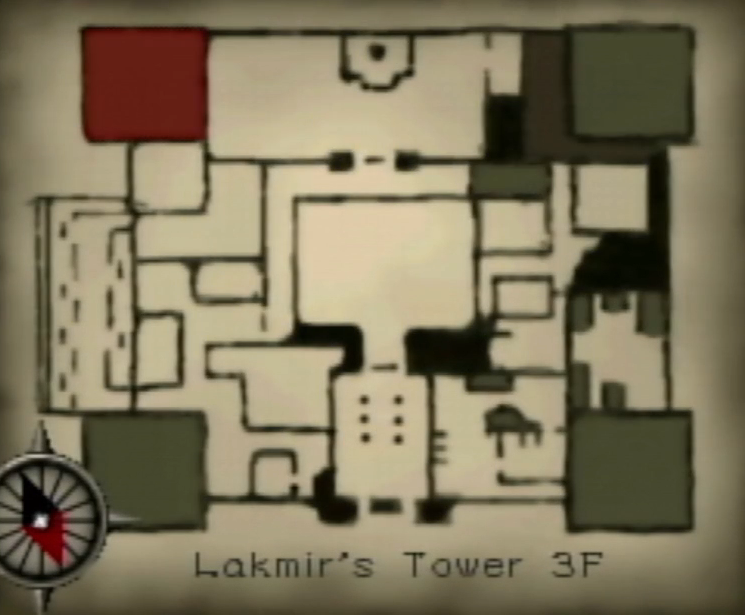
Lakmir's Tower B1
The thin metal doors which once held the Star Crest are now unlocked. Open them up and step through. This will whisk you up to the third floor.
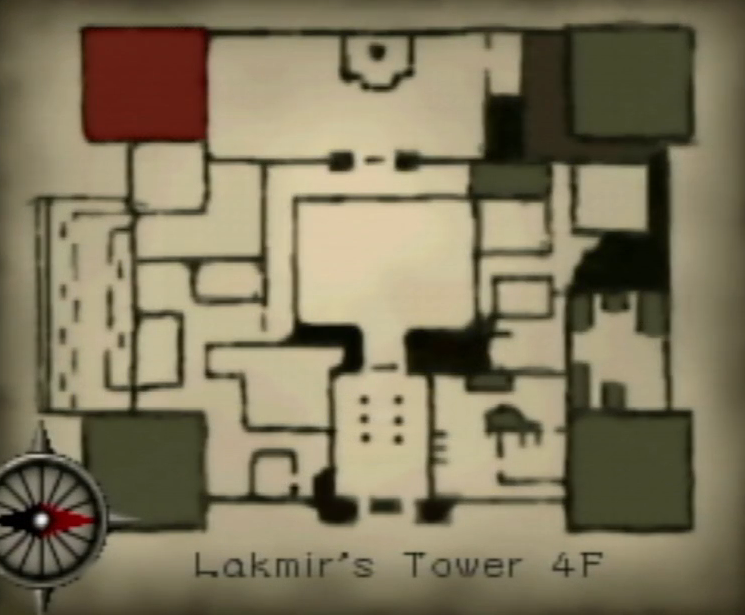
Lakmir's Tower 3F
Move toward the very fancy grate and Lakmir will once more appear to talk to you. This room begins a maze of sorts that leads to the upper floor. There will be a varying amount of knight busts on pedestals, and approaching one will teleport you to a new room. The goal is to approach the knights in a certain order to make your way through the maze. I'll be honest here, I'm not sure how you're supposed to solve this other than trial and error. I found a pattern, but I basically reverse engineered it after brute-forcing the puzzle. Not sure if there are any clues I missed that hint at a solution, or even if my pattern in a coincidence. Anyway, here's how to get through.
Each room you arrive in has a varying amount of statues, anywhere from 2 to 4. If you assign each one a number, starting with the statue on the left, then the path through the maze is 1 -> 2 -> 3 -> 2 -> 1. Here's how this shakes out:
- Starting room: there are three knights in here along one wall. If we stick with the numbering system, then the one on the left is Number 1, center is Number 2, and right is Number 3. To follow the system outlined in the previous paragraph, head to the statue on the left.
- In the second room, there are only two statues. So 1 and 2 from left to right. Head to the statue on the right.
- Third room has a whopping four statues. Two along the left-hand wall (1 and 2, from left to right) and two along the right-hand wall (3 and 4, from left to right). Since we're heading for Number 3, stand with your back to the door and turn slightly to the right. The first statue you see is the answer (or, when facing the right-hand wall, this will be in the left corner).
- Two statues in the fourth room, one against the left wall and one along the right. We're looking for Number 2, so turn right and approach that statue.
- In this fifth room, there are again two statues in similar positions as the previous room. The pattern decrees we head for Number 1, so turn left and approach the final statue. Note: if you want to read the tablet in the center of this room you'll need to move around to the other side. Once you're done reading you'll need to turn to the right to find the correct statue.
There's one statue in the next room, but it takes you back to the beginning so best to ignore that. Turning to the right reveals that we are now on the other side of that fancy grate. Head up the staircase near that grate to reach Lakmir's private chambers.
Lakmir's Tower 4F
Another hallway with a door on either side. This time we are going to enter the door on the left first. Inside there is a giant machine on the left, and a set of bookshelves on the right. First, head to the shelves and pick up the bottle of Forest Nectar (if you want to) and the Personal Journal (for some hints). Now spin around and approach the machine. Approach the left side of it, where you'll spot a large chute opening at the top of it. The goal here is to toss in something metallic that the machine will fold up into a tiny key. There are five objects potentially in your possession that will work: the Nail, Pickax, Crowbar, Ornate Key, and the Iron Bar. Choose whichever you want and toss it in, then head to the side and pick up the Crest Key. Leave this room and enter the one across the hall.
We're now in Lakmir's study/bedroom. The shelves on the left contain a couple items. The Pen is useless, but you'll want to grab the bottle of Night Elixer. Cross to the other side of the room, past the low partition wall. Beside the bed is a note about The Inner Chamber on the floor. This note mentions that you need to make the light of the stars to open the portal. What makes star light? A sunset leading into night, obviously. Walk onto the bed and get as close as you can to the bowl on the low wall. Use the Liquid Sunset on it, then pour in some Night Elixer. Once the two liquids are combined, and mist will erupt from the bowl and cause some spots on the ceiling to glow like stars. Note: if you were not properly lined up with the bowl, then Del will drink the liquids instead of pouring them into the bowl. In order to rid yourself of the states these put you in, just down some Dragon Tears.
Walk around the wall again and stand on the chair in front of the desk (maybe stopping to pick up the Memoirs from the desk if you want some extra lore). Once Del is atop the chair and normal person height, look up at the one remaining glowing red "star." When you examine it, Del will remark that there is a small keyhole there. If he just comments about the ceiling, adjust your field of view until you're lined up with the keyhole properly. Use the Crest Key on this to unlock the door by the bookshelves. Head through that door.
Inside the inner chamber are three rings on small pedestals. The Blue Ring comes in very handy later on, so grabbing it is recommended. The Green Ring will instantly kill you if you wear it, so only pick that up if you want to live dangerously. The red ring in the center is necessary for progress, so pick that up to get the Ring of the Dead. Lakmir will show up to tell you about the right, and note that wearing it allows you to communicate with ghosts while the living will be unable to understand you. There's a brief scene where we see Belzar arrive at the castle, and we learn a bit more about his evil plan.
And that is all we need from Lakmir's Tower.